
How to Review a 3D CAD Ring Design and Agree on Revisions

A polished hero render can make a ring look resolved before its structure has been properly reviewed. Reviewing and approving a 3D CAD ring design is more reliable when you can assess it from the top, front and side, not just at a photorealistic 45-degree angle. Those views help reveal proportions, alignment and details that a single image can conceal.
It’s natural to focus first on how the design looks, but approval also depends on how the stone, setting and band work together. A CAD render shows a model, not a photograph of the finished ring, so it helps to understand what it can show and what still needs discussion with your jeweller.
This guide explains which views to review, how to assess the ring’s dimensions, structure and stone clearance, and what to include in revision notes. You’ll also learn what to confirm before giving written approval, so the design is clear before production begins.
Key Takeaways
- Review top, front and side views to assess alignment and proportions beyond the hero render.
- Compare band width, taper and setting height with the stone’s dimensions and intended ring profile.
- Assess claw placement and clearance against the centre stone’s measurements and orientation.
- Organise revisions as specific, incremental changes, and record the design version and outstanding points.
- Before final approval, discuss scale, comfort and the selected stone with your jeweller.
Which render views should I ask to see before I approve anything?
Request top, front and side renders before approving an engagement ring. Together, these views reveal alignment and profile details that a single image can hide. In Australia, consumer guarantees under the Australian Consumer Law require goods to match their description, which can include an agreed custom design. The appropriate remedy depends on the difference.
Compare CAD Models and Rendered Illustrations
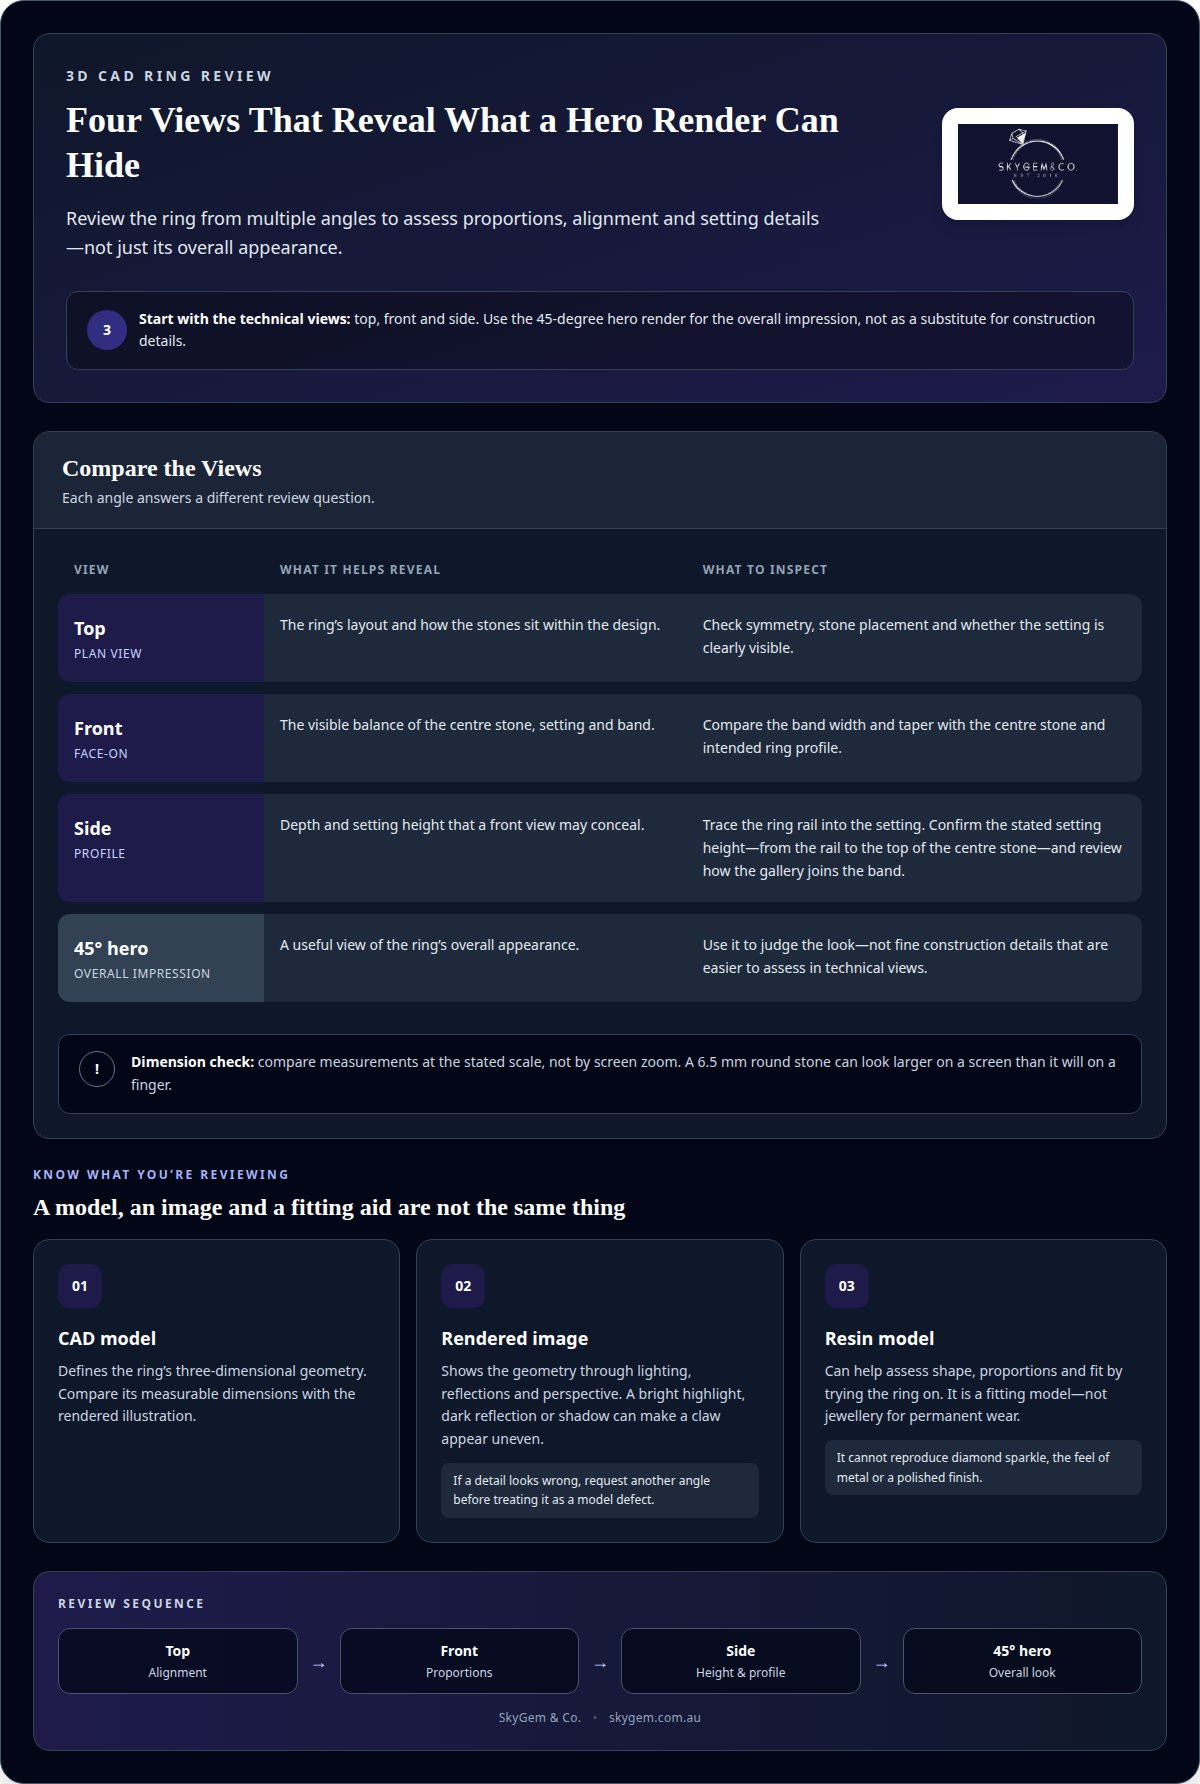
Compare the measurable CAD model with its rendered illustration before judging visual balance. The model defines the ring’s three-dimensional geometry, while a render presents that geometry as an image using lighting, reflections and perspective. Review top, front and side views for symmetry, stone placement and setting visibility. Treat a 45-degree hero render as a useful overall impression, not a substitute for technical views.
Check Render Limitations and Artefacts
Review the render in different lighting contexts, and distinguish model geometry from image effects. A bright highlight, dark reflection or shadow can make a claw appear uneven, so request another angle before treating it as a defect in the finished ring. A resin model can help you assess shape and proportions on your hand, but it cannot reproduce a diamond’s sparkle, the metal’s feel or a polished finish.
- Request top, front and side views, plus a 45-degree hero render. Use the technical views to assess symmetry, line quality and how clearly the setting holds the stones. Keep the hero angle for judging the overall appearance, not fine construction details.
- Compare dimensions at the stated scale rather than relying on screen zoom. For example, a 6.5 mm round stone can look larger on a screen than on a finger. A CAD render is a digital image of a model, not a photograph of the finished engagement ring.
- Use a resin model when you need to assess shape, proportions or fit by trying the ring on. Treat it as a fitting model, not jewellery for permanent wear. Remember that polished metal, real diamonds and hand finishing can change the finished appearance from the render.
How do you check the frame, stone height, and ring rail profile?
When reviewing and approving a 3D CAD ring design, compare the stated dimensions with the side profile, since a front view can hide changes in depth or setting height. For manufacturability, assess the complete model, including the head and band, with thin sections and production constraints in view.
-
Check Band Width and Taper
Compare the band’s width and thickness at the base, shoulders and narrowest point. Width and depth are separate dimensions. Check whether the taper suits the centre stone and transitions smoothly into the head. For example, a band that narrows sharply beneath a broad setting may look balanced from above but feel less substantial at the base.
-
Inspect Ring and Side Profiles
Trace the ring rail from the finger to the setting in the side view. Confirm that the specification gives the setting height, measured from the rail to the top of the centre stone. Review how the gallery joins the band and whether the profile matches the intended design. Use dimensions in millimetres rather than judging proportions by screen zoom alone.
-
Assess Stone Height for Everyday Wear
Consider the centre stone’s height in relation to how the ring will be worn. A high setting can affect how the ring catches on clothing or sits beside another band; a lower profile changes the design’s elevation. During reviewing and approving a 3D CAD ring design, consider these trade-offs against your intended use and note any contact points or concerns before approval.
- Ask the CAD designer to assess whether the complete model is suitable for the intended production process and 3D printing. Check that the head and shank form a complete object and that thin sections have been considered. An approximate 0.75 mm floor is commonly used in casting guidelines, but it isn’t a universal specification for every feature. Treat it as a prompt to discuss material and construction, not as a guarantee of strength.
To discuss how profile, thickness and setting height affect your design, arrange a design discussion.
How many revision rounds should I expect, and what should be in writing?
Treat two or three revision rounds as a planning guide, not a fixed allowance. A clear brief and written record help keep each change focused and make the final geometry easy to identify.
-
Set Expectations for Revision Rounds
Agree on a revision process before the first CAD review. Custom jewellery CAD projects often involve two or three rounds, while a vague brief can lead to three or four extra rounds. Use the first review to group priorities, such as finger comfort, stone position and band geometry. In later rounds, separate essential corrections from optional refinements so decisions stay clear and the design doesn’t shift without purpose.
-
Make Incremental CAD Revisions
Send one prioritised set of changes per round, naming the feature and the intended result. For example, ask for a gallery adjustment for comfort while keeping the band profile unchanged. Check the revised geometry against that request before adding another change. Incremental edits make it easier to see the effect of each adjustment; broad, late-stage changes can affect connected features and prompt another review.
-
Document Written Approval
Identify every review copy by filename, version number or date, then keep the comments with that version. Before production approval, state in writing which version you’ve reviewed and list any outstanding issues. For example, “Approve ring_v3, dated 12 October, with no open design changes” is clearer than “Looks good”. Submit requested changes before final written production approval, not in an informal message afterwards.
-
Complete the CAD Approval Checklist
Use a final sign-off to record the approved file identifier, the selected stone or placeholder, agreed dimensions and finish, and any unresolved points. Include a clear statement that production may proceed only for that version. A checklist should also capture the agreed changes from earlier rounds, such as a gallery adjustment or comfort refinement. Once approved, the model may proceed towards wax or resin production and metal manufacture, so later changes may require extra work and cost.
Reviewing prong geometry and stone clearance
Compare the setting against the centre stone’s measured length, width and depth before approving its geometry. An approximate 0.75 mm floor is commonly used in casting guidelines, but it isn’t a universal minimum for every feature; setting tolerances depend on the stone and design.
-
Check Centre-Stone Measurements and Orientation
Start with the selected stone’s exact length, width and depth, then compare each measurement with the CAD seat. For example, an oval seat measuring 7.2 by 5.4 mm is meaningful only if it matches the intended stone. Confirm the oval’s direction, so its long axis follows the agreed design rather than appearing rotated in the model.
Check that the CAD uses the stone’s actual dimensions rather than a generic placeholder. A mismatch can affect the seat, prong positions and visible proportions. Record the stone measurements and orientation in your revision notes, so the next model can be compared with the same reference.
-
Review Centre-Stone Placement
Inspect the stone from above and from the side, checking that it sits centrally in the head. Compare its position with the band’s centre line and the intended setting height. If it appears shifted towards one shoulder, ask whether this is an intentional design choice or a geometry issue to revise.
Check clearance around the stone’s outline and beneath its pavilion. The setting should accommodate the stone without visible collisions between the gem, claws or gallery. Use the CAD dimensions to describe concerns precisely, such as a seat that needs alignment with the oval’s measured length.
-
Assess Claw Proportions and Stone Security
Review each claw’s position, spacing and contact with the stone from multiple angles. Claws measuring 1.1 mm are one example from a ring model, not a universal specification. Compare their proportion with the centre stone and check that they don’t obscure more of it than the agreed design requires.
CAD claws may look longer or thicker because extra material can be included for cutting and finishing around the stone. Ask how the finished prong shape will relate to the model, and confirm that the stone is held securely without obstructing its visible outline. Record any agreed change before production.
-
Check Small-Stone Count and Layout
Count the small stones shown in the CAD and compare the total with the agreed design. Follow the layout along each shoulder or halo, checking spacing, symmetry and orientation. If one side appears uneven, mark the specific position for review instead of requesting a general visual adjustment.
Inspect how each small stone sits in its setting and relates to neighbouring stones. The CAD should show the intended arrangement clearly, without obvious overlap or inconsistent gaps. Include the required count and any layout changes in the written approval so the production model follows the agreed pattern.
Reviewing the design with a jeweller
For reviewing and approving a 3D CAD ring design, bring the agreed brief and stone details into a focused consultation. Start with the decision that matters most, such as a lower profile, a particular gallery shape or how the ring should sit beside a wedding band. Ask how each proposed adjustment affects connected geometry, comfort and the finished jewellery, rather than considering each feature in isolation.
- Compare the model with the actual stone’s length, width and depth. If the CAD uses a placeholder, clarify this before discussing the stone seat or claw positions. Ask your jeweller how the selected stone’s measurements affect the setting, gallery clearance and proportions. Record any required adjustment as a specific revision, so the next review addresses the same dimensions.
- Discuss the dimensions that influence structure and fit, including ring size, band width, band thickness and setting height. Consider interior smoothing and finger contact points alongside the design’s appearance. For example, changing the band thickness can affect its profile and transition into the head. Reviewing and approving a 3D CAD ring design means considering those connected details together before treating a change as final.
- Clarify how the design will move from digital review to production. Agree on the file format used in the manufacturing workflow, and confirm that the approved model represents the intended geometry and finish. Casting and hand-finishing can make the finished ring differ from the CAD file by fractions of a millimetre. Discuss how these processes may affect visible details before sign-off.
- End the consultation by recording each agreed decision in writing. Identify the current CAD version by filename, version number or date, and list any outstanding issues. State whether the model uses the selected gemstone or a placeholder, and specify which version is approved to proceed. This written reference keeps later discussions tied to the same design, even if questions arise during production.
SkyGem & Co.
SkyGem & Co. can help connect your CAD review with the engagement ring and stone you’re considering. A measured design clarifies proportions and setting choices, while your priorities guide which details deserve attention. Discuss the ring’s overall direction, centre stone and practical preferences together, so each design decision relates to the piece you want.
For a clean focal point, a Solitaire Engagement Ring keeps attention on the centre stone and its setting. This style makes the relationship between stone size, claw placement and band profile especially visible. If your review notes focus on how the head sits above the band, discussing a solitaire design can help frame those choices without treating a render as the finished ring.
A Halo Engagement Ring may suit a design that places smaller stones around the centre stone. In this case, review the halo’s outline, spacing and relationship to the centre setting in the CAD. A Trilogy Engagement Ring offers another design direction, with three stones shaping the ring’s visual balance. Your preferred style can guide which dimensions and proportions to discuss with your jeweller.
Your choice of centre stone also informs the design. SkyGem & Co. offers Lab-Grown Diamonds if that suits your preference. Whichever stone you’re considering, its actual dimensions matter to the CAD geometry: length, width and depth affect the seat, setting and overall proportions. Keep those measurements linked to the design version you review rather than relying on a screen impression alone.
For a bespoke engagement ring, bring your design priorities, stone details and revision notes to the discussion. You might focus on a particular profile, the relationship between the gallery and band, or how the ring could sit beside a wedding band. SkyGem & Co. can help you consider these choices across its engagement ring options, so your next decision builds on the design you’ve reviewed.
Contact SkyGem & Co. to discuss your engagement ring design and the details you’d like to resolve.
Turn your design decisions into a clear next step
A ring design is easier to move forward when its technical choices reflect what matters to you personally. Before your next conversation, consider the design priority you most want to protect, whether it’s a distinctive silhouette, a particular stone or how the ring complements your daily style. That priority can guide decisions when aesthetic preferences and practical details need to be balanced.
Reviewing and approving a 3D CAD ring design is not simply a final visual sign-off; it’s a considered decision about the piece you want made. Bring your preferences and questions into a focused discussion with SkyGem & Co., and use that conversation to determine the next design step.
A thoughtful design process gives you a clear basis for moving ahead and making the ring distinctly yours.
Frequently Asked Questions
Can I see my custom design in person before it is cast?
A resin fitting model gives you a physical impression of the ring before metal production. It lets you assess the shape and proportions on your hand, but it isn’t finished jewellery or intended for permanent wear. Use it to consider how the design looks and sits, while relying on the CAD specifications for details the model cannot represent, such as polished metal or gemstone sparkle.
Can I still make changes after the CAD approval?
Changes may still be possible, but approval signals that the identified design is ready to move towards production. Once work begins, an alteration can require additional work and cost, particularly if it affects connected components such as the setting and band. If you notice an issue after sign-off, describe the exact change and refer to the approved version so its effect on production can be assessed clearly.
How can I tell if the ring will actually be comfortable and wearable?
Use the CAD review to consider how the inner band contacts your finger and how the head transitions from the shank. Think through a typical day, including whether the ring will sit beside another band or catch on clothing. A physical fitting model can provide useful evidence about fit and scale. Comfort also depends on personal preference, so describe any pressure points or movement you notice when trying it on.
How close will the finished ring be to the approved CAD model?
The approved CAD geometry guides the finished ring, but it cannot show every characteristic of completed jewellery. Polished metal, real stones and hand-finishing affect appearance, and manufacturing can introduce small differences. Treat the approved dimensions and design relationships as your reference, rather than expecting the render’s lighting or reflections to be reproduced. If a particular surface finish matters, state that expectation clearly in the written design agreement.
How do I read a custom jewellery CAD design before approving it?
Start with the design’s overall outline, then inspect the head, gallery and band as parts of the same structure. Use the top view to understand the stone arrangement and the side view to assess elevation. Check whether the model represents the selected gemstone or a placeholder, as this affects how accurately you can judge the setting. Name any unclear feature and the view where it appears to make your feedback easier to act on.
Is a CAD rendering a photo of the finished ring?
No. A CAD rendering is a digital image generated from a three-dimensional model, not a photograph of completed jewellery. Software lighting can create bright highlights or dark reflections that won’t match every real setting. The render also cannot reliably communicate the feel of the metal or the particular sparkle of a diamond. Use it to assess the design’s form, and discuss material and finish separately.
What should you check when reviewing a 3D CAD ring design?
Check that the model reflects the agreed stone, dimensions and overall design intent. Then assess how the centre stone, setting and band relate, and identify any feature that differs from the written brief. Before approval, make sure the version is clearly identifiable and unresolved changes are recorded. This helps prevent feedback for an earlier draft from being mistaken for final instructions.
How do you verify ring size and fit in a CAD model?
Confirm that the CAD specification states the intended ring size and matches the size established for the wearer. A digital model can define the band’s internal geometry, but a correctly sized physical sample provides more direct evidence of fit and feel. Consider whether the ring will be worn alone or stacked with another band, as this can affect how it feels.