
How to Measure Ring Size at Home: A Professional Guide

Investing in a bespoke engagement ring is essentially a high-stakes engineering project where a single millimetre determines the structural success of the final design. It’s natural to feel a sense of trepidation when you’re tasked with capturing this measurement yourself, especially when you’re navigating the confusion between internal diameter and circumference. You want the certainty that your investment in a solitaire or trilogy ring will result in a piece that sits securely and comfortably. This guide details exactly how to measure ring size at home with the technical precision required for high-end jewellery. By following professional protocols, you can eliminate the guesswork that often leads to costly resizing or structural compromises.
We’ll master the application of the EN ISO 8653:2026 standard, which uses internal circumference as the primary metric for accuracy. You’ll learn why biological factors like temperature and time of day are critical variables in your data collection. We also examine how technical specifications, such as the width of a men’s diamond wedding band, dictate whether you should adjust your final size. This methodical approach provides the reliable data needed to proceed with a bespoke commission in total confidence, ensuring your chosen gemstone or lab-grown diamond is showcased on a perfectly fitted band.
Key Takeaways
- Understand why precision is non-negotiable for bespoke pieces, especially those with intricate halo or pavé settings that resist easy resizing.
- Discover a step-by-step technical protocol for how to measure ring size at home using non-elastic materials to minimise the margin of error.
- Learn to distinguish between inside and outside diameter when measuring an existing piece to ensure a successful surprise proposal.
- Account for environmental variables like thermal expansion and band width to ensure your ring remains comfortable throughout the day.
- Identify when to transition from DIY measurements to professional validation to protect the long-term viability of your bespoke jewellery project.
Order Now: multi colored stone rings
The Importance of Precise Measurement for Bespoke Jewellery
Ring size is technically defined as the internal diameter and circumference of a circular band. While many individuals research how to measure ring size at home, it's vital to recognise that this measurement acts as the engineering blueprint for the entire manufacturing phase. Different regions utilise various international ring size standards, yet the fundamental physics of the fit remain constant. Precision is the priority because a bespoke piece is balanced around these specific dimensions to ensure the security of the gemstones and the longevity of the metal.
For sophisticated engagement rings, particularly those featuring pavé or halo settings, the manufacturing tolerances are exceptionally tight. Small diamonds set into the band rely on the specific curvature of the metal to maintain tension. Resizing a finished piece introduces several technical risks that you don't want to encounter:
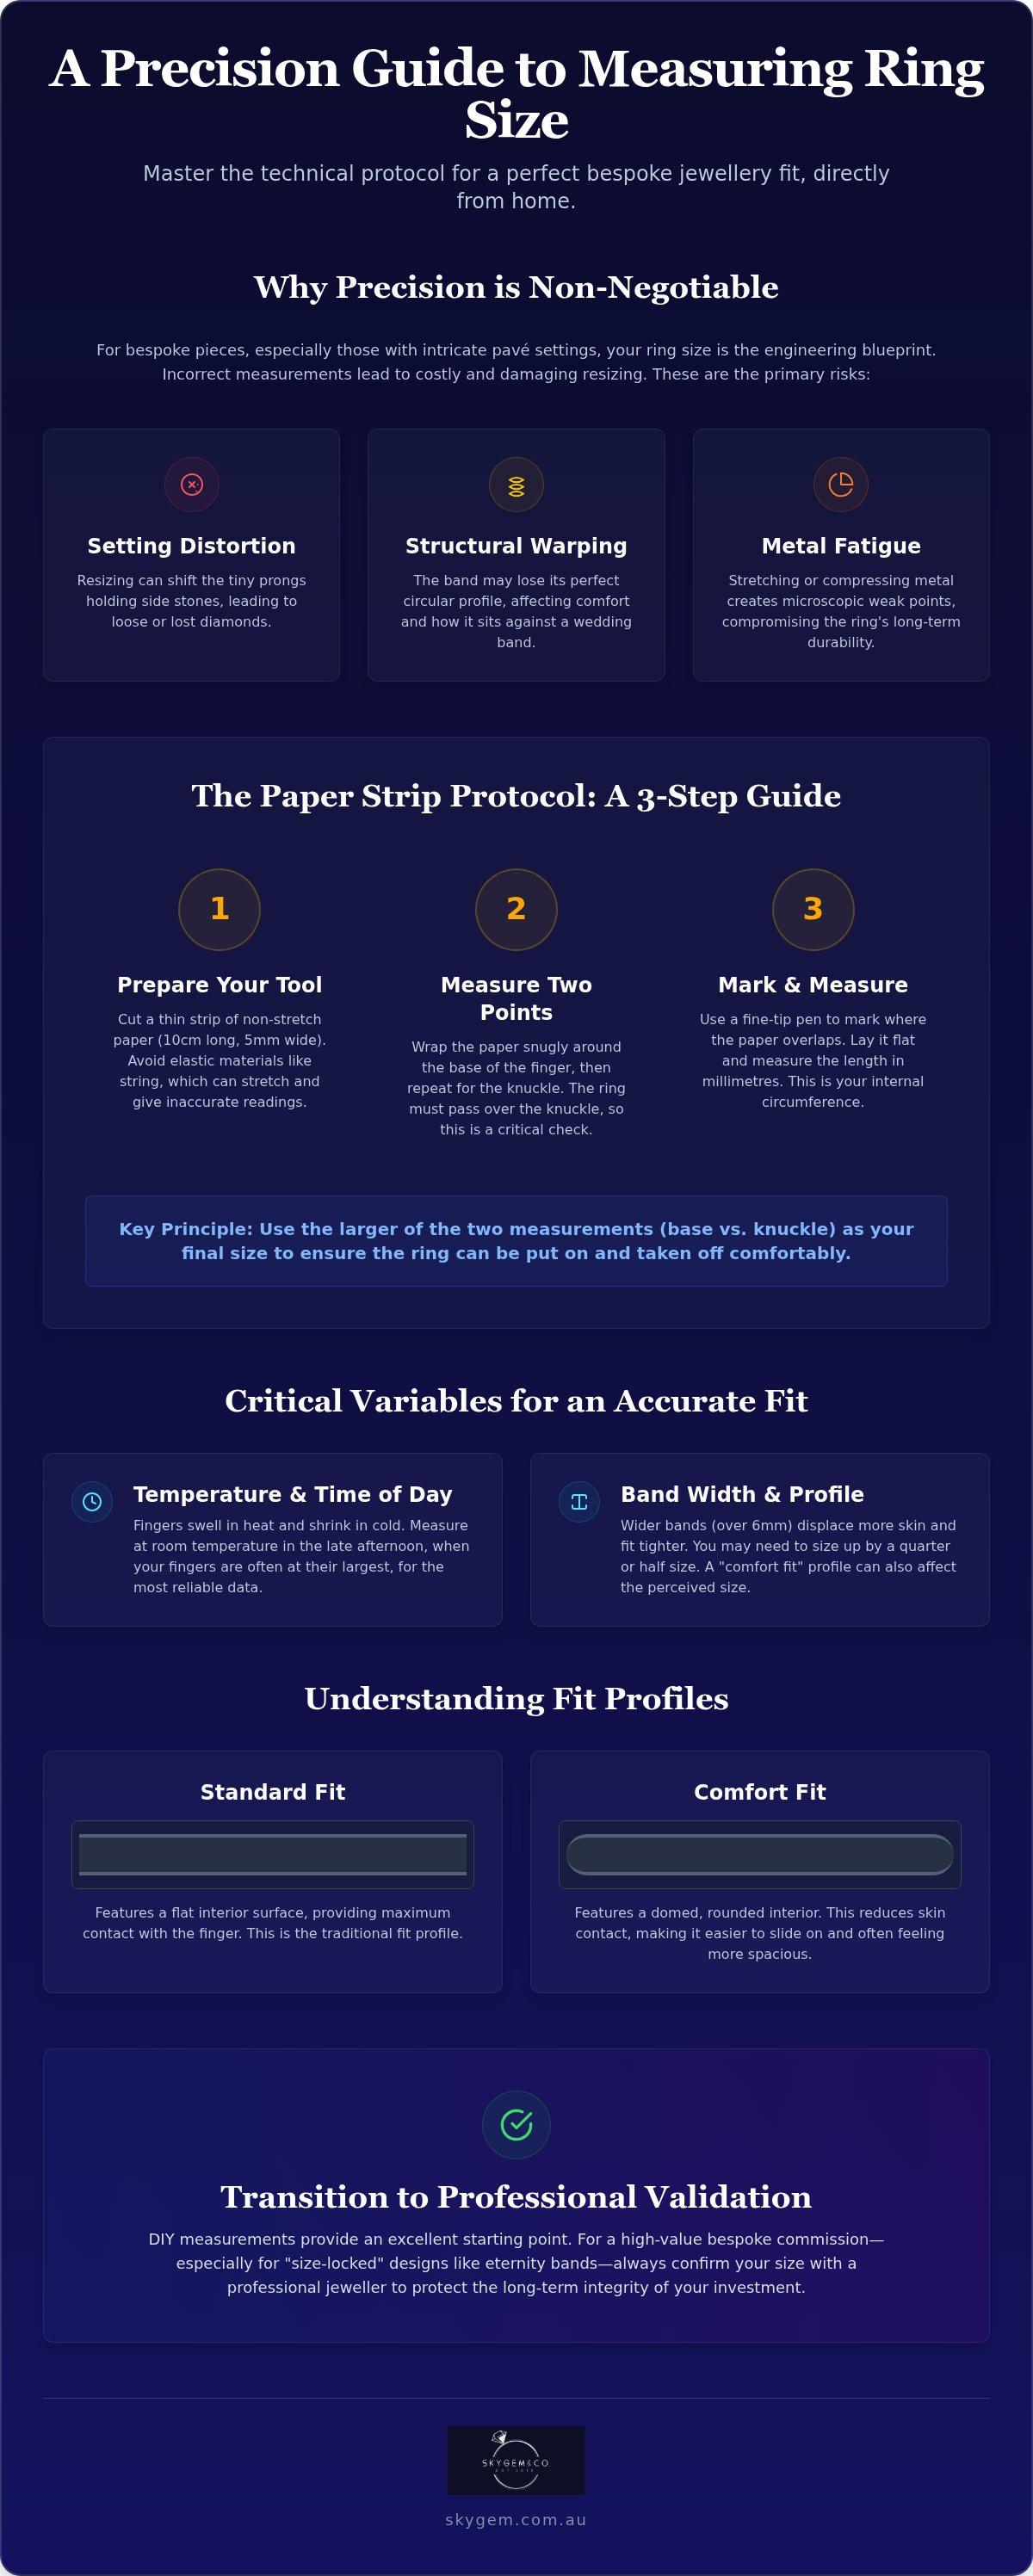
- Setting Distortion: The tiny prongs holding side stones can shift during resizing, leading to loose or lost diamonds.
- Structural Warping: The band may lose its perfectly circular profile, affecting how it sits flush against a future wedding band.
- Metal Fatigue: Mechanical stretching of high-purity gold or platinum can create microscopic weak points in the shank.
Achieving the "Perfect Fit" is the ultimate goal of the measurement process. This state is reached when the ring remains secure during standard movement but provides enough clearance to slide over the knuckle with minimal resistance. It's a calculated balance between the unique anatomy of the wearer's finger and the geometric precision of the jewellery. If you don't account for the knuckle's width, the ring may become trapped or sit too loosely on the base of the finger.
Explore More: what hand does the wedding ring go on
Resizing Limitations in Custom Design
Certain designs are technically "size-locked" from the moment of creation. Full-eternity bands, which feature a continuous row of diamonds around the entire circumference, cannot be resized without a complete reconstruction of the piece. Similarly, intricate engravings or filigree work will be visibly disrupted if the band is stretched or compressed. Bespoke integrity is maintained when the metal's molecular structure remains undisturbed by post-production mechanical expansion or contraction.
Standard vs. Comfort Fit Profiles
The internal geometry of a band dictates how the size is perceived by the wearer. A standard fit has a flat interior surface, while a comfort fit incorporates a domed interior. This domed profile reduces the surface area touching the skin, which often makes the ring feel slightly more spacious than a standard band of the same diameter. Selecting the appropriate profile is essential for ensuring the ring remains a comfortable, permanent asset for daily wear. When you learn how to measure ring size at home, you must decide which profile aligns with your comfort preferences before finalising the technical specifications.
Reliable DIY Methods: The Paper and String Technique
While string is frequently cited as the most accessible tool when researching how to measure ring size at home, it presents significant technical pitfalls. String is inherently elastic; it can stretch during the wrapping process or when pulled against a ruler. In the context of high-end jewellery manufacturing, a discrepancy of just 0.4 millimetres can shift a ring's fit by a half-size. We advocate for the use of non-stretch paper strips to achieve a more stable and repeatable measurement.
The Paper Strip Protocol
To execute this method with precision, follow these specific steps:
- Step 1: Cut a strip of non-stretch paper approximately 10cm long and 5mm wide. Avoid textured or thick cardstock that might add artificial bulk.
- Step 2: Wrap the paper around the base of the finger, then repeat the process for the knuckle. The ring must pass the knuckle to be wearable, so the larger of these two measurements is your primary data point.
- Step 3: Use a fine-tip pen to mark the exact point where the paper overlaps. A thick felt-tip marker can create a margin of error that compromises the final fit.
Consistency is the foundation of accuracy. We recommend taking three or four separate measurements at different times of the day to find a reliable average. This methodical approach accounts for the minor fluctuations in finger volume that occur naturally. If your measurements vary significantly, it may be beneficial to book a technical consultation to verify your findings before production begins.
Measuring for Circumference
Once you have marked your paper strip, lay it flat against a metric ruler. Measure the distance from the end of the strip to your pen mark in millimetres. This figure represents the internal circumference of the band. Circumference is the most reliable metric for home measurement because it avoids the parallax error often associated with trying to find the exact centre-line of a circular object for a diameter reading.
After determining the circumference, you can cross-reference this value with the Australian alphabetical sizing scale, which ranges from A to Z. While many online charts exist, referencing professional ring sizing techniques ensures you are using a validated data set. If your measurement falls between two sizes, we generally advise selecting the larger size to allow for future adjustments, as most bespoke bands are easier to downsize than to expand.
Using an Existing Ring for Diameter Conversion
Measuring an existing piece of jewellery is a strategic choice for those planning a surprise proposal. It bypasses the need for physical access to the wearer's finger, which is often the most significant hurdle in the design process. However, this method requires strict adherence to technical parameters to be successful. You must ensure the ring you select is worn on the correct finger and the correct hand. For instance, the ring finger on a dominant hand is typically larger than its counterpart on the non-dominant hand. Using a ring from the wrong hand can result in a fit that is either dangerously tight or insecurely loose.
A common error involves confusing internal diameter with external diameter. The external diameter includes the thickness of the metal band, which can vary significantly between a delicate pavé setting and a heavy men's band. When learning how to measure ring size at home using this method, only the internal space, which is the void where the finger sits, remains relevant. Including the metal thickness in your calculation will result in an oversized ring that lacks the necessary security. This is particularly risky for engagement rings where the weight of the centre stone can cause a loose band to spin or slide.
The Internal Diameter Method
For the highest degree of accuracy, a digital caliper is the preferred tool. It eliminates the parallax error common with manual rulers. If you are using a standard metric ruler, place the ring flat and measure the widest point of the internal circle in millimetres. You can then calculate the circumference using the geometric formula: Diameter multiplied by 3.14. It's critical to verify that the ring is perfectly circular before taking this measurement. Over years of wear, gold and platinum bands can become slightly oval-shaped. This skews the diameter reading and necessitates a more thorough assessment of the piece's geometric integrity.
Verification with a Printable Chart
Many individuals utilise printable size guides as a secondary verification step. This involves placing the physical ring over a series of printed circles until a match is found. For a true match, the entire printed silhouette must be visible inside the ring's internal circumference without any overlap or gaps. Be wary of low-resolution files or incorrect printer settings. If the print scale is off by even 5%, the resulting size will be incorrect. Reviewing expert tips for measuring ring size can help you identify these common pitfalls before committing to a bespoke design project. Always double-check the "test square" usually provided on such charts to ensure the document has printed at exactly 100% scale.
Critical Factors: Temperature, Width, and Anatomy
Biological variables represent the most common source of error when determining how to measure ring size at home. Unlike a machined component, a human finger is a dynamic structure that fluctuates in volume based on several physiological factors. Thermal expansion is a primary concern; blood vessels dilate in high temperatures to dissipate heat, causing the finger to swell. Conversely, cold environments cause vasoconstriction, leading to a smaller measurement that won't reflect the ring's fit during warmer months.
The "Time of Day" rule is a standard industry protocol for a reason. Most individuals find their fingers are at their largest in the evening after a full day of activity and hydration. Measuring in the morning, when the body is often slightly dehydrated or cooler, can result in a ring that feels uncomfortably tight by sunset. Temporary swelling can also be induced by high salt intake or strenuous exercise. It's best to measure when you're at a stable, resting heart rate in a room-temperature environment to ensure the data is representative of your daily baseline.
Anatomy also dictates the required geometry of the band. The "Knuckle Factor" must be addressed for those with prominent joints. If the knuckle is significantly wider than the base of the finger, the ring must be sized to clear the joint while remaining secure enough not to spin once in place. This often requires a calculated compromise between two different measurements to ensure the piece remains functional and comfortable for long-term wear.
The Wide Band Rule
The physical width of the ring band drastically alters how the size is perceived. Wider bands cover more surface area and displace more skin, creating a tighter sensation than a thin solitaire band of the same internal diameter. This is a critical consideration for men’s wedding bands, which are often designed with substantial, heavy profiles. We suggest sizing up by approximately a half-size for any band exceeding 5mm in width to maintain comfort and prevent skin irritation from moisture trapped under the metal.
The Dominant Hand Variance
Data from professional fittings consistently shows that the dominant hand is often half a size larger than the non-dominant hand. This is due to increased muscle development and blood flow from frequent use. You must measure the specific finger on the specific hand intended for the ring. If you're researching how to measure ring size at home for a left-hand engagement ring, using a right-hand ring as a reference will likely lead to an inaccurate result.
To ensure a reliable measurement, follow this environment checklist:
- Conduct measurements indoors at a stable, comfortable room temperature.
- Ensure you are well-hydrated but haven't consumed excessive sodium in the last 24 hours.
- Take measurements at the end of the day when finger volume has stabilised.
- Repeat the process over three different days to confirm a consistent average.
Professional Verification and Bespoke Consultations
Home methods provide the foundational data required to begin the design journey, but professional verification remains the definitive step for high-stakes projects. While learning how to measure ring size at home is an essential preliminary task, the precision required for a bespoke engagement ring necessitates a transition from DIY tools to industrial-grade standards. This secondary validation protects the structural integrity of the piece and ensures the final product aligns perfectly with the wearer's unique anatomy. Relying solely on a single home measurement can be risky, as it doesn't account for the subtle nuances that a seasoned consultant identifies during a physical review.
Ordering a Professional Sizing Tool
Plastic belt-style sizers offer a significant technical advantage over the string or paper methods discussed previously. These tools are manufactured to consistent tolerances and mimic the feel of a physical band more accurately than non-rigid materials. We recommend wearing a sizer for a full 24-hour cycle. This allows you to experience how your finger volume responds to different activities, such as typing, exercising, or sleeping. This longitudinal data is particularly important for GIA-certified diamond settings. When you're securing a high-value stone, the band must provide a stable platform that resists unnecessary movement while maintaining user comfort across all environmental conditions.
The SkyGem Consultation Advantage
The transition from home data to a finished piece involves complex geometric translations. Our technical consultants use your findings as a baseline for the CAD (Computer-Aided Design) phase, where every fraction of a millimetre is accounted for in the digital model. We don't just record a size; we analyse the design's specific centre of gravity and weight distribution. For example, top-heavy solitaire designs often require a slightly snugger fit to prevent the ring from rotating or spinning on the finger. By integrating your home measurements into our custom design workflow, we can adjust the internal profile of the band to counteract these mechanical tendencies. This level of detail ensures the ring remains upright and properly oriented, showcasing the gemstone's brilliance at all times.
Finalising these technical specifications during a professional session acts as the ultimate safeguard for your investment. A physical consultation allows us to verify the "snap" of the ring over your knuckle and the security of the fit at the base. It’s a collaborative process where technical precision meets your personal comfort preferences. This final step ensures the transition from a conceptual design to a physical asset is seamless and successful. By combining the convenience of learning how to measure ring size at home with the reliability of expert oversight, you can proceed with the confidence that your bespoke piece will be a permanent, perfectly fitted asset.
Securing Your Bespoke Investment with Precision
Mastering the technical aspects of how to measure ring size at home is the definitive starting point for any successful high-end jewellery project. By documenting consistent measurements across different times of day and accounting for the specific width of your intended band, you provide the essential data needed for a stable design. If you don't account for these variables early, the final fit may suffer during the manufacturing phase.
As bespoke manufacturing specialists, we prioritise a transparent, education-first approach to ensure your investment is protected. From stone procurement to the final benchwork, our focus remains on long-term viability, reflecting our commitment to specialised Australian design standards. Professional verification is the final bridge between your preliminary research and a piece that fits with engineering precision.
We look forward to partnering with you to create a permanent asset that reflects your unique vision and fits perfectly for a lifetime.
Frequently Asked Questions
Can I use a piece of string to find my ring size accurately?
String is technically unsuitable for precision measurements because of its inherent elasticity. When you pull string tight against a ruler, it stretches, often leading to an oversized result. Even a minor discrepancy of 0.5mm can shift a ring by a full size. For those learning how to measure ring size at home, we recommend using a non-stretch paper strip or a specialised plastic sizer to ensure the data is repeatable and accurate.
What should I do if my knuckle is much larger than the base of my finger?
You must find a technical balance between the knuckle's diameter and the base of the finger. If a ring is sized only for the base, it won't clear the joint. Conversely, a ring sized only for the knuckle will spin excessively. We typically advise taking both measurements and selecting a size that requires some effort to push over the knuckle but doesn't feel restrictive once it sits in its final position on the finger.
Is there a difference between Australian and US ring sizes?
Australia follows the UK alphabetical system, whereas the US and Canada utilise a numerical scale. These systems are based on different mathematical increments, so a simple conversion isn't always perfect. A US size 7, for instance, roughly equates to an Australian size O. Because global standards vary, we always cross-reference measurements with the internal circumference in millimetres to ensure the bespoke manufacturing process remains precise and consistent with international standards.
How much does the width of the ring band affect the size I need?
Band width significantly impacts the perceived fit because wider metal surfaces displace more skin. A 2mm solitaire band will feel much looser than a 6mm band of the same internal diameter. As a general rule, any band exceeding 5mm in width usually requires a half-size increase. This adjustment prevents the "suction" effect and ensures the ring remains comfortable during natural finger fluctuations. It's a vital consideration for wider men's diamond wedding bands.
What is the most common ring size for women in Australia?
While individual anatomy varies, the most common ring sizes for women in Australia typically fall between L and O. This range corresponds approximately to the US sizes 6 to 7 commonly found in global purchase data. However, relying on averages is risky for bespoke projects. Every millimetre matters when securing high-value stones, which is why we prioritise individualised technical consultations over standard size assumptions to ensure a perfect, secure fit.
Is it better to size up or size down if I am between two sizes?
It's technically safer to select the larger size if your measurement falls between two alphabetical increments. Most precious metal bands, including gold and platinum, are easier to downsize by adding sizing beads or compressing the shank. Expanding a ring is a more invasive mechanical process that can thin the band or compromise the tension of diamond settings. Choosing the larger size provides a safer margin for future professional adjustments without risking the ring's structural integrity.
How does temperature affect my ring size measurement?
Temperature causes significant fluctuations in blood flow and soft tissue volume. In warm environments, fingers expand as blood vessels dilate to regulate body heat. In cold weather, the tissue contracts, which can make a well-fitted ring feel loose. To get a reliable result when learning how to measure ring size at home, always take measurements in a room-temperature environment at the end of the day. This ensures your data reflects your finger's most stable state.
Can all engagement rings be resized if the home measurement is wrong?
Not all designs allow for post-production adjustments. Full-eternity bands and rings with intricate pavé or halo settings are often size-locked because the metal's curvature is integral to the stones' security. Mechanical resizing can warp these settings and lead to stone loss. This structural limitation is why we emphasise professional verification as the final step before our experts begin the CAD design and manufacturing process for any bespoke engagement ring or high-value piece.
Disclaimer
This article is for general informational purposes only and may include AI-assisted content. Pricing, specifications, and availability are subject to change. For accurate advice and current information, please contact SkyGem & Co. directly. Nothing in this content constitutes professional or financial advice.